


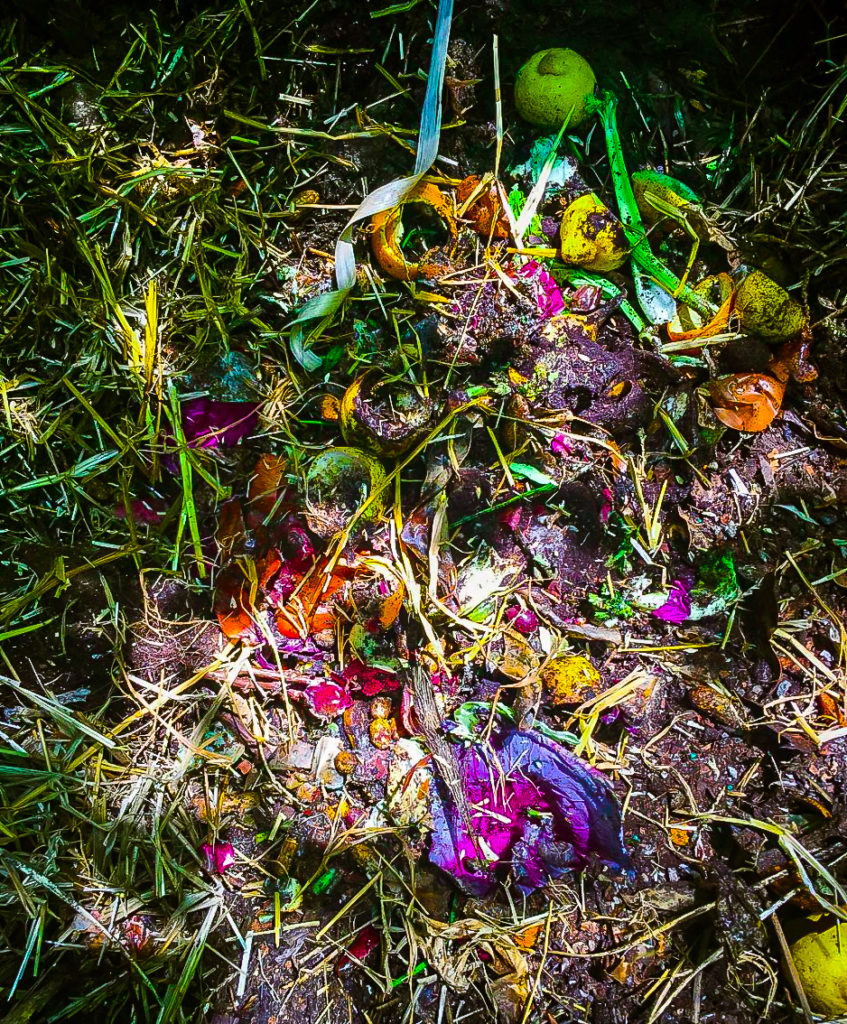
Composting can be as simple as throwing your food scraps into a pile and covering them. Still, there are some considerations you should take into account when thinking of composting in an urban/suburban area. Here are three methods of at-home composting, and the pros and cons of each. You should know what kind of attention you can give your pile (if any) and if there are any issues with wildlife (or, in my case, rats) that you should beware of when building your composting system.
OPTION 1: SLOW + LOW PALLET PILE
What is it?
The “Slow and Low” method, as I like to call it, is the lazy gardener’s dream. In this method, you make a designated space in your yard where you empty your food scraps, you cover them with at least two parts carbon (read: brown material such as leaves), and you let nature do the work breaking down the food into rich, fertile soil. Many people create multiple bays using recycled pallets, so once a pile is finished, you can stop adding to it and let it rest while you continuing composting in a second bay.
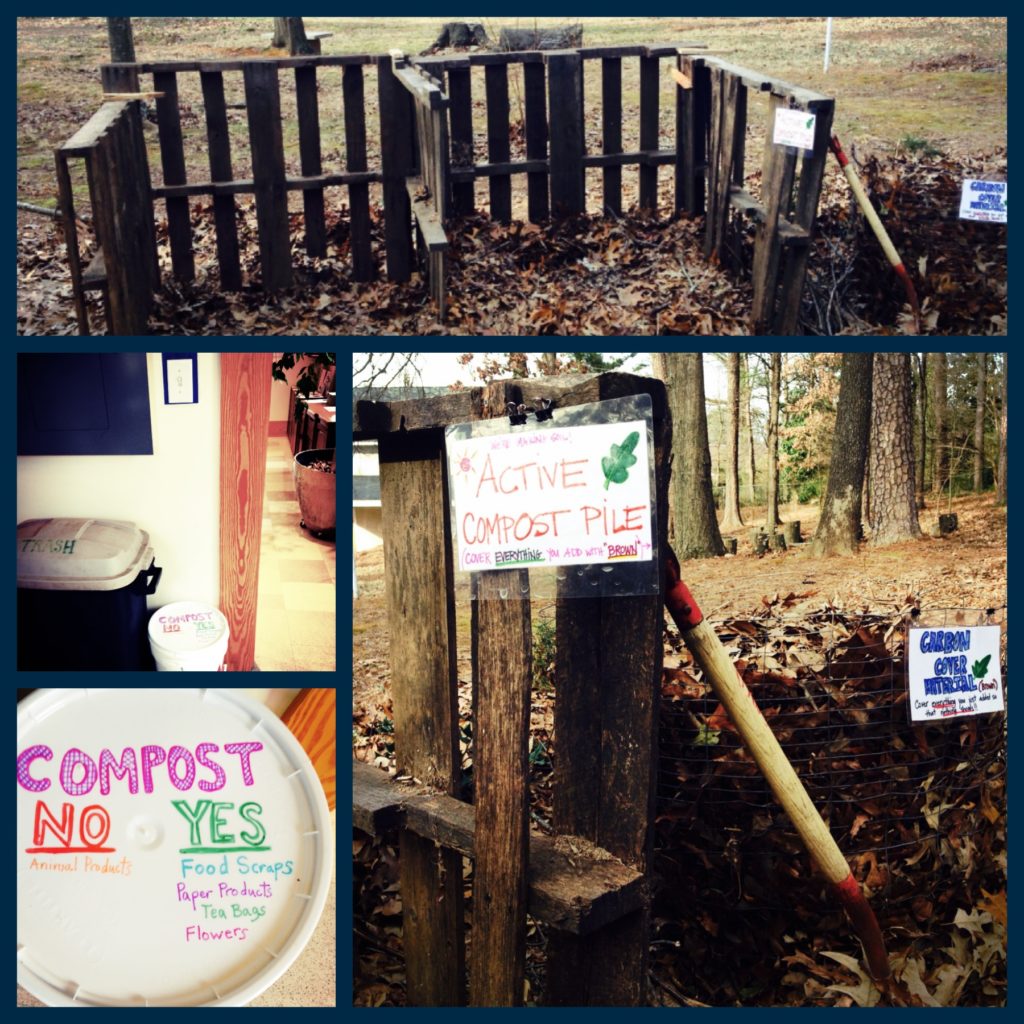
Pallet pile system, using leaves to cover scraps
How to do it?
It starts with identifying a good spot, far enough from your house that you aren’t going to smell it on a humid summer day, but close enough that you actually use it. You can easily wrangle used pallets from a local hardware store. The two main things to know to do this method effectively are:
- COVER COVER COVER. Always cover your food scraps with at least twice as much carbon (brown material like leaves) that the volume of waste you are disposing.
- Keep the pile to a 3 high to 3 wide-ratio, which helps keep it hot, so the thermophilic bacteria that eat the waste are happy, and your pile doesn’t go anaerobic.
Pros?
This method is cheap. It doesn’t require any purchased infrastructure. By choosing this method, you let nature do her work and patiently awaiting soil that can be used in the garden. Plus, it’s easy to get started, so you can begin composting quickly.
Cons?
Some things to consider before you choose this method:
- It will be smelly if you don’t cover your scraps well. There is a difference between a composting pile and an anaerobic, festering pile.
- If you live in an HOA or a dense neighborhood, this method will likely attract your neighbors’ unwanted attention if you are not discreet.
- You run the risk of attracting rats.
I used to be a huge proponent of this method. It worked great when I lived on a farm and had plenty of space and no neighbors to piss off. When I used this method in my first urban homesite, I discovered it comes with a cost in the city: rats.
For a couple of years, the pile was fairly innocuous, and we would see an occasional critter, but that changed when a neighboring house was gutted. The rats that lived in the renovated house took to the woods and were quickly attracted to our compost pile. The heat that the pile emits during winter and the consistent food source were huge liabilities. Plus, this type of pile is open-air, so there is nothing to stop them from moving in. Nocturnal visits to the pile from the new rat families that now resided in the woods behind my house quickly turned into unwelcome guests. When they took up residence in our basement, causing a massive headache that required us to rip out the ceiling, fix wiring, and seal our crawl space.
OPTION 2: THE TUMBLER
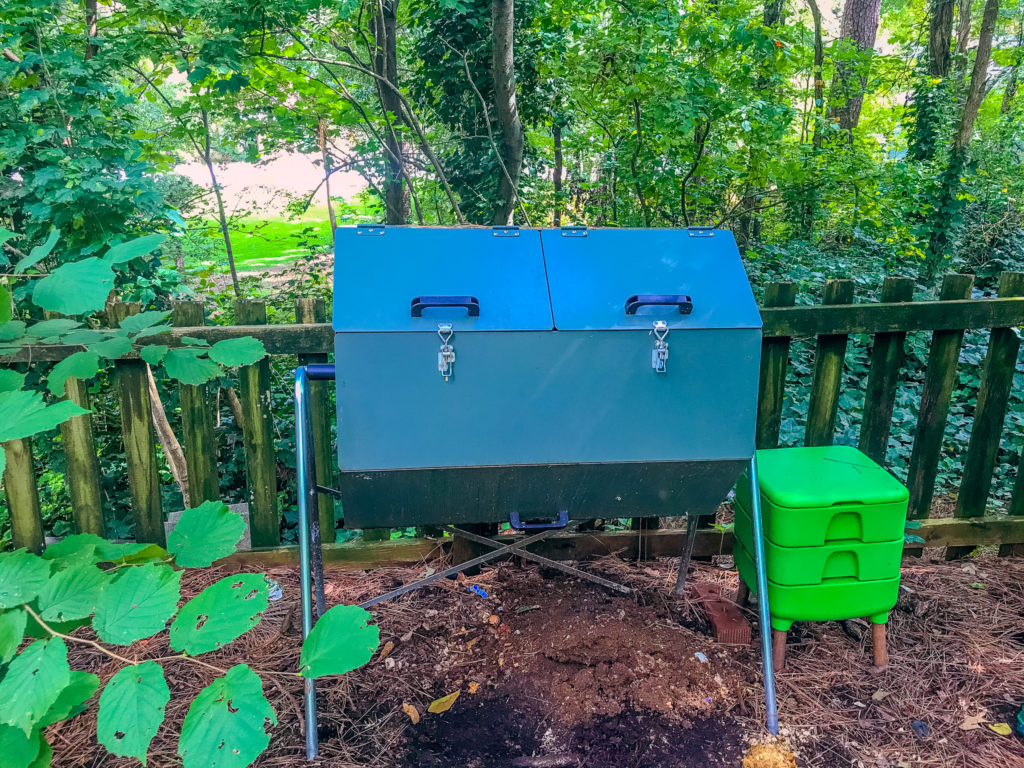
Jura 70-gallon compost tumbler(left), and my daughter’s worm farm (right)
What is it?
A tumbler is a free-standing, elevated barrel of sorts that you fill with food scraps and periodically turn using a handle, so the leftovers oxygenate and decompose.
How to do it?
This method is extremely easy. You collect your scraps and pour them into the tumbler. Some models recommend adding carbon, and others do not. Our Jura Compost Tumbler has two compartments, so you can stop adding to one side to let it sit, and add to the other side in the meantime. This gives the fallow side time to break down without disrupting your flow of composting.
Pros?
It’s easy. It’s self-contained, so, depending on the model, you don’t need to worry about rodents. This was, of course, a huge deciding factor for our household, and one of the reasons we went with the Jura. I also appreciate that it’s made of metal and is more sturdy than its plastic counterparts.
Cons?
Depending on how much cooking you do and how many food scraps you generate, they fill up fairly quickly. It would help if you considered this when choosing the right model for your lifestyle. We have a 70-gallon tumbler. Each compartment is 35 gallons. We filled both sides within six months, but we had not turned it enough for the fallow side to be completely decomposed, leaving us in a pickle. We decided to take the almost-finished compost out and finish it on the ground, but if it had not been as well decomposed as it was, I would be very reluctant to empty the compartment so as not to attract rats again. Another con is that compost tumblers can get expensive quickly. There are definitely some budget-friendly options, though, so take a peek on the internet if this is something you are considering.
OPTION 3: A SUBSCRIPTION SERVICE
What is it?
A subscription composting service, such as Compost Now in Atlanta, is a weekly or biweekly pick up service that collects your compost and finishes it offsite, often giving finished compost to its patrons.
How to do it?
Usually, you get a bucket with specific instructions about what and what not to compost. You fill the bucket (with a lid), and then depending on the volume of waste you generate, the company picks up your bucket either weekly or biweekly.
Pros?
This is a fantastic option if you want to divert waste from the landfill, but are wary of composting at your home, either because you feel daunted by the prospect or you simply do not have the space (i.e., apartment dwellers). And bonus: you get access to fertile, nutrient-rich soil that is professional quality compost that you can use on your site or in your houseplants without the labor of composting yourself.
Cons?
The main downside is the cost. Subscription services start at about $20/month and can go up from there.
While these are not the only three methods for home composting, they are, in my opinion, the most popular and most accessible. Ultimately, however, the responsible management of organic waste shouldn’t fall entirely on the consumer’s shoulders. Many municipalities are exploring curbside compost pick-up, just as your trash and recycling are picked up. This can be of great economic benefit to cities that can then sell the finished compost to residents for a premium. Some cities, such as Seattle, WA, and Boulder, CO, have programs like this already in place. The most significant barrier to this type of program for most cities is the infrastructure’s cost to implement it on a broad scale, but it has been proven possible.


