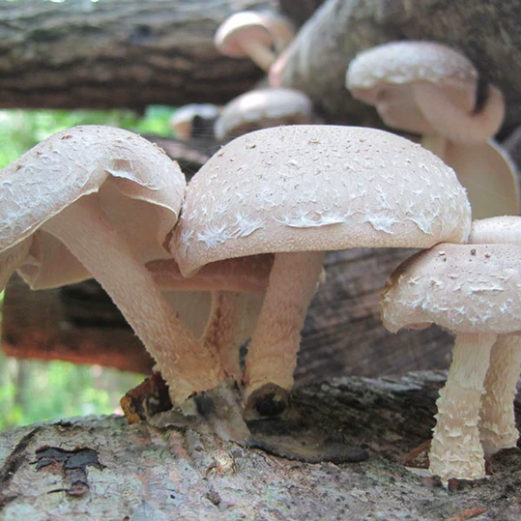
Shiitake mushrooms fruiting from inoculated logs at my home in Atlanta.
Growing mushrooms at home is easy, fun and inexpensive. Some methods include kits, but my preference is always DIY. Whichever route you choose, growing mushrooms at home provides an excellent opportunity to experiment, learn more about the process and observe what happens along the way! Not to mention, you’ll get to add some tasty, super healthy food to your family’s diet without much effort.
If you elect to go the DIY, log-based route, you’ll need inoculated dowels if you’re growing mushrooms on logs. This option involves buying inoculated dowels from a mushroom retailer like Mushroom Mountain based in South Carolina (not far from the borders of both Georgia and North Carolina).
And, naturally, you’ll need some logs! One great way to source them is to call a local tree service (like our neighbors at Gill Tree Care!) and ask them to save a couple logs for you to pick up—the logs should be about 3-5 inches in diameter and roughly 4 feet long. Wait two to three weeks from the time the log was cut before beginning the inoculation process, as most woods have natural fungicides that keep trees from being colonized by fungus. It’s equally as important to make sure that the logs weren’t cut and sitting too long before you source them. It’s a good idea to avoid using logs more than 6 months old to minimize the chance that there is already another type of fungus growing on the logs, as that could inhibit or prevent the growth of the mushroom species you’re aiming to cultivate at home.
The type of wood you’ll need will depend on the type of mushroom you want to grow. For shiitake, hardwoods like oak are best, although some people have had success with softwood species, too. Oyster mushrooms on the other hand grow great on softwood species like sweet gum or poplar. It’s best to avoid using conifer logs for most mushrooms, though.
Once you’ve got your logs and you’re ready to go, drill holes the size of the dowel and pound the dowel into the log.
Next, melt wax (preferably beeswax) in a double boiler and use a paint brush to coat the dowels and the holes with wax to create a seal.
Once you’ve inoculated and sealed your logs, place them in a shady, moist area near your home. Ensuring the log has some contact with the ground and is exposed to the elements will help foster the right environment for mushrooms to thrive—we lean ours up against a fence in a shady, moist side of the house. Check on them every time there is a rain and eventually you’ll see mycelium, which looks like white strands, colonizing the wood. That’s when it will start flushing with the fruiting body of your favorite mushroom!
Another easy, inexpensive option for growing mushrooms at home is inoculated sawdust in a plastic bag. These come in kit versions, but you can also make them yourself. Store them in a bathroom where it is dark and moist and you’ll start to see flushing pretty quickly. One time when we used this method, we stored bags in our bathroom and consistently enjoyed mushrooms for 6 months!
Don’t have the time or not quite ready to go full-out DIY with mushroom growing at home? There are some great kits that make things even easier! Our friends at MindBodyGreen did a round up of the “8 Best Mushroom Growing Kits of 2022.” Click here to check it out and see which kit might work best for you!