What do you do when the water you are managing in your landscape didn’t originate on your site? We work with clients quite often who are the recipients of their neighbor’s stormwater. Unfortunately, standard building practices focus on getting the water “away” and not as much on making sure not to create a headache for those downhill.
I want to highlight one such project where this was happening on an extreme level, and show you exactly how we worked with the water so we were able to direct it where it’s useful in the landscape by slowing it down, spreading it throughout the planting areas, and sinking it in the soil. “Slow it! Spread it! Sink it!” as Brad Lancaster chants.
I also want to highlight how working with water can be an interactive process, in that it sometimes becomes necessary to tweak your original work so that it is the most functional. Even after doing this work for more than a decade, we still have surprises occasionally, and the approach needs to be adjusted to accommodate the new information.
I’m always surprised because working with water (especially overland water) follows one primary principle⏤it goes downhill⏤and yet, it can be such a complex process that defies intuition. My hope is that we can share how we approach water⏤what we see, what problems we encounter, and how we creatively solve them so you can learn from our experiences. As always, feel free to reach out with questions!
THE SITE:
When we came on the scene, the clients were having issues with their garage flooding due to new development uphill from them. Part of the site was also very overgrown with English ivy, which had taken down a few trees. Their goal was to fix the water issues (flooding their yard and house on one side, and eroding the soil on the other), and reclaim the overgrown spaces for growing a food forest abundant with fruits, nuts, berries, and medicinal and native perennials.
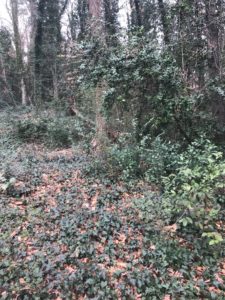
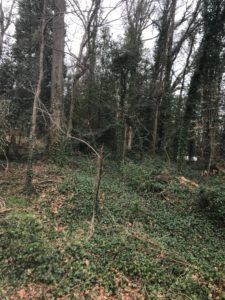
Overgrown forest with English ivy and lots of opportunistic species
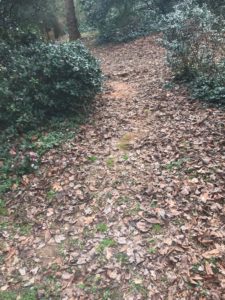
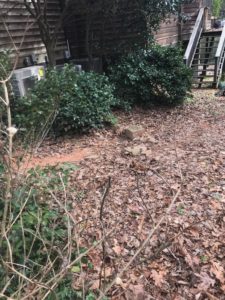
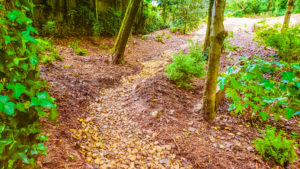
Eroding soil from so much overland water
STEP 1: INVESTIGATE
Our approach was first to observe where the water was coming from. Recent development uphill from the client (multiple new homes) compounded an issue that was manageable before. When we investigated the top of the watershed, we saw that there were a couple of things happening that caused this issue in our client’s yard.
- The storm drain on the street is not at the low point of the street. Oops. This means stormwater is bypassing city infrastructure and rushing down multiple driveways, straight into this client’s yard.
- The lots uphill that were once forested were more-or-less cleared before construction, which breaks the water cycle and let’s the water rush unencumbered downhill.
- The houses uphill follow standard building practices for water management⏤sending the stormwater “away” and choosing to not manage it onsite so it becomes an issue for the person downhill.
Of course, there is a larger conversation to have about stormwater management and construction practices, as well as tree protection policies. These are governed by city ordinances, and are slowly changing. Keep raising your voice and pointing out issues to your city officials.
STEP 2: OBSERVE THE PATTERNS
You can learn a lot about water even when it isn’t raining.
Where is the rain already flowing? We began by looking for evidence of water flow, such as bare/exposed clay subsoil, and deposits of leaves and debris. We walked the property line to see where water was entering the site (under the fence). We also looked at overall topography. Where is it coming from, where is it going?
What’s growing onsite? Look for hydrophilic species such as sedges and gill-over-the-ground for evidence of saturated soils. This is often an area of pooling during heavy rains.
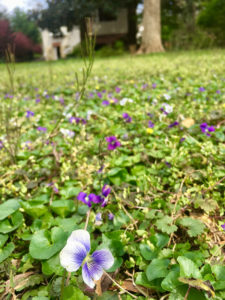
Gill-over-the-ground
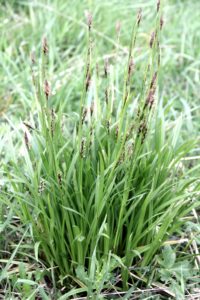
Sedge
One other piece of information is HOW MUCH WATER? Look uphill to estimate the size of the watershed. One acre of surface yields approximately 27,000-gallons of water in a 1” rain. This is markedly more difficult when working with overland water than with a known surface, such as a roof or driveway.
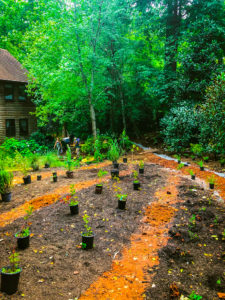
STEP 3: DESIGN + IMPLEMENT
The way we work with the overland water is focused on slowing it down, spreading it out in strategic areas within the yard where we want to create passive irrigation for new plantings, and giving the water the opportunity to percolate into the soil.
Once you have a sense of where the water is coming from and where it is going, you can begin to think of ways to slow it down and spread it out. On this site, we used one primary technique, with multiple functions to achieve this.
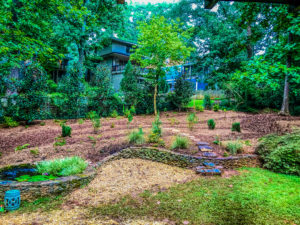
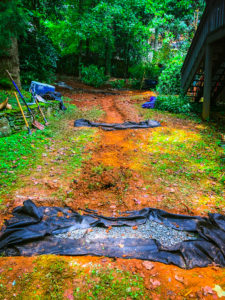
- We created a large diversion swale that sends the water to the side of the house that doesn’t flood. This diversion swale is a stone-lined creekbed sited at a 1% slope that carries the overland water (but not too fast) to a place where it is more easily integrated into the soil and ecosystem. It’s important that it isn’t too steep because that allows the water to infiltrate, and keeps the swale from channelizing.
- Within the creekbed diversion swale, we dug several underground infiltration pits lined with 57 stone gravel. This leaves lots of void space in the pit (~75% for gravel). We lined these pitys with geotextile fabric to increase their longevity by keeping them from silting up with clay (which is often suspended as tiny particles in stormwater). The infiltration pits serve to slow the water down as it’s rushing down hill, and also allow it to sink into the soil. Think of them as speed humps in the water change.
- In true permaculture fashion, this creekbed is multi-functional. It serves as a place to collect water, infiltrate it along the food forest, and it’s a path for site circulation.
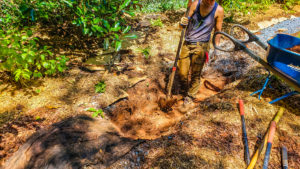
Infiltration pit
Infiltration pit lined with geotextile fabric and gravel
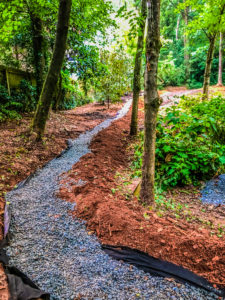
Creekbed path with gravel base
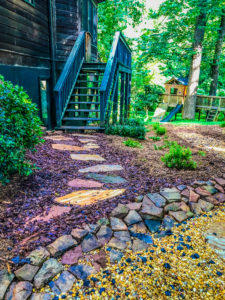
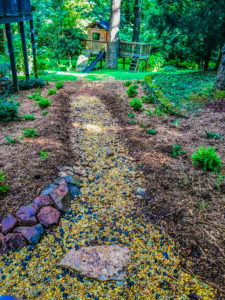
Creekbed path with eggrock top
Creekbed path with step stones, nearing the end of the swale
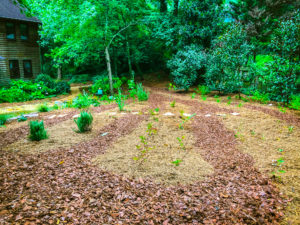
Remember, wise water management works with nature. We’re not trying to resculpt the whole site to drain the water. Instead, we want to identify where the water is the most useful (and away from the house), and creatively get it there without creating erosion or impacting tree roots.
When working with overland stormwater, it’s important to overbuild. More development means more runoff, means more volume to deal with during a rain as time passes. For instance, use heavy stones that won’t be swept away in huge rain events.
STEP 4: REFINE
Be ready to tweak your work based on real-time feedback, especially when working with an unknown volume of water. Within an hour of completing this installation, we had an epic rain (2” in 20 minutes!), which was an INCREDIBLE opportunity to see how it performed. Immediately, we saw that there was even more water entering the system than we thought, and we made adjustments. We added a drain box at the top of the diversion swale that takes a percentage of the entry point water, and sends it through a level spreader into the forest. We also added a couple more infiltration pits to slow the water even more. And lastly, we built up and reinforced some berms to make sure that when the water is coming it goes where intended.